Thursday, 16 February 2012

Project 2 Overview

Finished.
Pleased with it.
Sent away.
Positive Comments.
Phew!
:)

Wednesday, 15 February 2012

Project 2 Developing Your Marks - Stage 6

Using Thread and Yarns to Create Textures

I spent a lot of time going back and forward and changing my mind about which picture I wanted to base this final sample on.  Indecision is one of my weak points!  Eventually I decided to use a piece I made based on some photo's of an oil spill off of the Spanish coast last year.  I found them to be really affecting images, all at once finding them heart breaking and beautiful, and they stayed with me for a long time.  You can't see them brilliantly in the photo but one of the tings that I keep coming back to is the incredible contrast when you use complimentary colours together, blue and orange being a particular favourite of mine.

I made an image of the photograph at the top right using wax crayons and oil pastels to create the orange lines and then washing over the top with an exceedingly wet wash of dark blues and greys into which i dropped some salt and did some spattering of ink and water to create more texture.

 Then I made a wrapped sample of all of the thread colours I wanted to use to guide me in my colour choices as the literature had suggested.

When it came time to create the final sample I spent quite a lot of time obsessing about the colours of the fabrics not being exactly right, until it finally ocurred to me that it would be impossible to match everything exactly unless you had all of the thread and fabric in the world at your fingertips.
I ended up using a base of blue felt which was just far too blue so I stuck some patches of a pale blue shimmery sheer and some muddy green interweave stuff here and there, with some greeny-blue open weave hessian on top and a layer of navy blue netting topping off the sandwich.  When I began stitching I used some embroidery floss to do lots of tiny seed stitches here and there, followed by a detached chain stitch in a dark green and then I covered the lot in random patches of diagonal straight stitch in a pale blue cotton to try and represent the highlights of light on the waves.  The oil patches were created by first of oil couching down a big thick woolly/felty fibre thing, that I'm not sure what it is or where it came from but I love it, and then echoing the shape of that with rows of stitching in an embroidery floss and in various shades of orange cotton, I also couched down some thick orange tapestry wool.

Overall I am really pleased with the effect that I achieved here and once I got over the worry of the colours not being a perfect match I thoroughly enjoyed making this piece.

Project 2 Developing Your Marks - Stage 5

Stitches To Create Texture

I practiced lots of different stitches on scraps before I began to make my stitched samples for this section, I also read 'Stitches: New Approaches' by Jan Beaney very thoroughly to try and help me explore the stitches capabilities a bit more.  When I was feeling brave I started putting together a sampler of sorts.
 I used different thicknesses of thread to create different versions of chain stitch, running stitch, cretan stitch and satin stitch.  I paticularly like the effect that can be achieved from using a very thin thread to create a stitch on top of an exisiting one in a very thick thread.
In the second part of this stage, where I was required to use my stitches to echo the patterns from one of my drawings, I chose this quick sketch of a passion flower from my Mum's garden in the South of France.  The original drawing had very faint outside petals and I decided to use a very delicate one strand of embroidery floss to create tiny cross stitches to try and capture that fragility, for the stamens in the middle I used my new found bullion stitch which i think worked pretty and well and the rest of it was just made with different thicknesses and lengths of straight stitch.

Project 2 Developing Your Marks - Stage 4

Preparing to Create Textures

I think I might've got a bit carried away on this one.  Once I'd picked out all my drawings and chosen all my fabrics and threads it felt like a bit of a waste not to do the stitching.  So I fannied about for quite a while making up several stitched samples when I didn't really need to!


This was a sort of a collage-y, painted picture that turned into a layered, embroidered, beaded thing.
I used a crumpled sheer sewn on to the background with running stitch and then apliqued a black felt fish tale, I used tiny white seed beads to recreate the fishes spots.


I used blue and green embroidery thread couched down to try and recreate the textures from some of the snakey samples.


I made this picture based on the skin of a Parrot fish, it was a background of watercolour, coloured on top with red oil pastel and then enhanced with some Pearlex powder to try and give it a metallic sheen.  When it came to the textile interpretation I had two different ideas and so I decided to try both of them out together.  First of all I wanted to try and make a very matt background which I did with this very open weave green hessian stitched on to a green cotton background, and then to use the red polyester sheer on top to bring some shine into it, I tried to couch down a thin strand of the sheer with green thread to create the red spots, I also tried just stitching down a flat piece.  I think the couched 'ribbon' works much better.  On the right I wanted to try out a beautiful metallic green sari fabric that I've had knocking about for years, I tried recreating the red patches with both felt and using embroidery floss in Satin stitch, both of which I though would help tone down the shininess a bit. I overstitched the whole lot with a matt green thread in running stitch to try and cut back on more shine.  For me I think the rough hessian and the couched sheer have worked out the best and this is an approach I think I will use again.


Inspired by the texture of this flower in a magazine photo of a bee, I made a little accordian booklet of different mark making techniques that could be used to recreate it, they included - bleaching, wax resist, water colour pencils and markers.  I then finished off the book with this little sample with different approaches to creating the flower in stitch, I tried out making an eyelet, French knots and big chunky cross stitch in a tapestry wool, also sewing down white seed beads and white sequins with a thin orange thread.

I enjoyed this exercise and am glad that I took the extra time to do some more stitching, if only because it helped me to feel a bit more comfortable with the stitches and also with the whole ritual of sitting down and sewing.

Tuesday, 14 February 2012

Project 2 Developing Your Marks - Stage 3, A Sample


I think this photo has appeared several times around here now, 
I really, really, really, really love the colours of it.  I made this quick crayon sketch based on it.
I found it hugely helpful to have all my stuff sorted into bags of colours, generally when I want to create something I know that the perfect colour of thread/paint/paper/bead is definitely in the house but it's not to hand and by the time I find it the moment to create has passed and I have to make someones tea or wipe someones bottom instead.  Organisation is a skill I really need to try a bit harder to excel at.

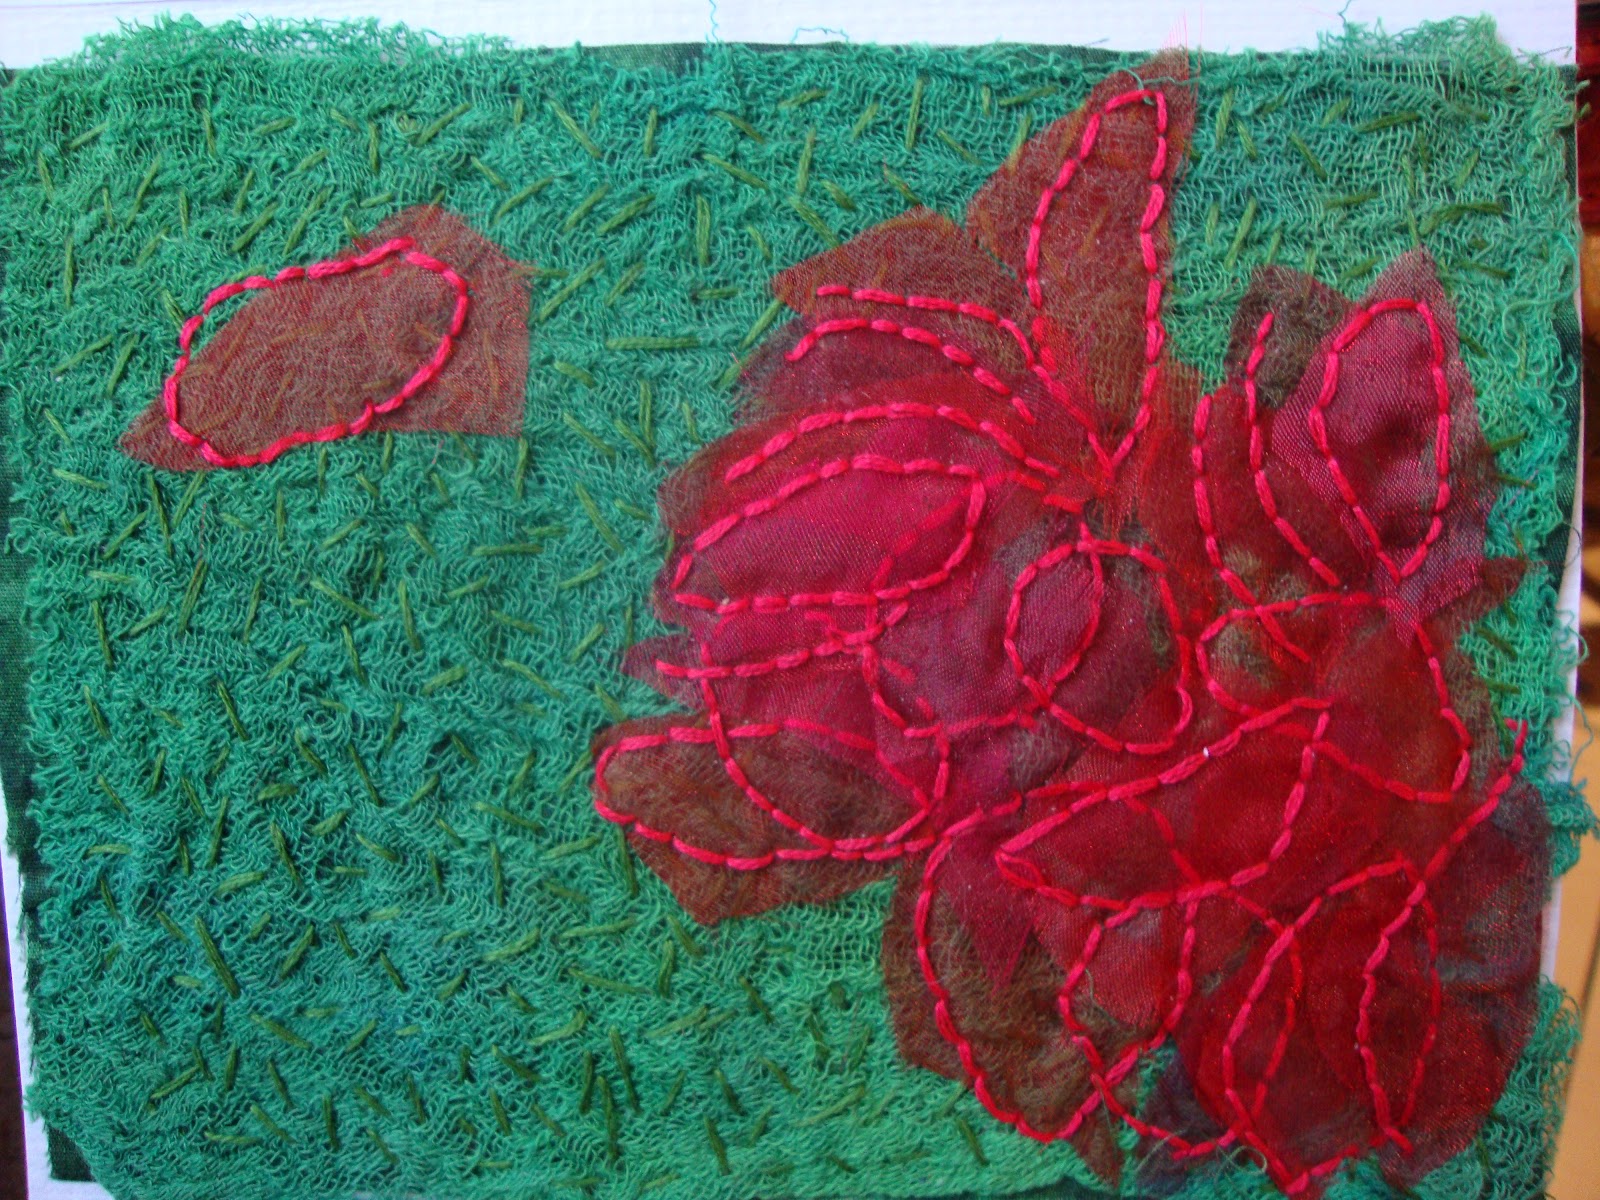
This is my sample -


This is not nearly so bluish in real life, far more a foresty green.  It's a base layer of dark green quilting cotton with a layer of a hand dyed  green scrim attached by a sort of a big seed stitch to try and represent the blades of grass.  The leaves were made from random leafy shapes in different shades of red sheer stitched down with back stitch to echo the outlines of the leaves.

I was very satisfied with this attempt, it made me ridiculously happy to have a finished piece in my hand and I think that my stitch choices were good ones for the work.

Project 2 Developing Your Marks - Stage 2

Exploring Marks and Lines Through Stitch Techniques

There were a good deal of practice samples that I was so disgusted by that I've hidden them away at the back of my wardrobe.  Reading through the course literature helped me a bit and I used some books to help me figure the stitches out, I find those diagrams really difficult to follow though, at one point I had to get my exceedingly practical other half to explain Cretan stitch to me!

Eventually though I managed to produce this -


I know it's not brilliant but it was a huge leap forward for me and it helped me to go on to produce this -


My family are quite insistent that it's a map :)

Things that I really enjoyed about stitching this were couching and seed stitch which i think is really effective over a large area, particularly in the metallic thread, although that turned out to be a pain the bottom to stitch with!  I know it's not very exciting but the thing I love the most is running stitch worked in a normal sewing thread.  I think it is really nice worked on top of everything else, it has a consolidating effect that I enjoy.

I struggled a bit with the more deorative stitches, although perhaps just because I'm not terribly familiar with them, the only one I really knew was Blanket stitch, having spent most of my evenings in December sewing an entire shopful of felt food together with it for tiny boy's Christmas present.  I quite enjoyed Satin stitch but I should've gone for a thicker thread, satin Stitch in single strand cotton is a bit soul destroying.

Project 2 Developing Your Marks - Stage 1 , Preparation

Officially Prepared!

I had no idea I had so much stuff.

Slightly worried about starting this stage, I feel like everyone else has approached this course from a textile background and worried about the drawing element and I am completely the opposite.
My embroidery experience is pretty limited -
I made a cloud sampler at primary school:)
I don't know the names of stitches and straight lines are not my forte.
Help!