Thursday, 29 December 2011
Saturday, 10 December 2011
Ice Palace

The Ice Palace from Dr Zhivago
Wish I hadnt looked it up on wikipedia.
It was filmed in a hot Spanish summer.
Created from frozen beeswax and marble dust.
:(
Holidays

Well, I'm not sure I really deserve it, but my beardy man always takes his time off at the beginning of December, and so I am taking it too. I have done virtually nothing for the last ten days and intend to keep up the inactivity for at least another week. Normal service will be resumed shortly, in the meantime, aren't dead roses beautiful?


Tuesday, 22 November 2011


Tuesday, 15 November 2011
Project 1 Making Marks : Stage 2 - Exercise 4 Fishing

I'm not even sure that this fits in here, but I decided somewhere along the way that I would rather make patterns than random marks while I was experimenting. And then my tiny boy wanted to look through this book about fish and get me to tell him the names of all the fishes and they were so bright and interesting that I decided I would use their patterns.
I used combing, pricking, bleaching, wet on wet, pastels, acrylics, wax resist and even some pearlex powder to add a bit of shimmer!

watercolour ink, oil pastel and pricking

wet on wet watercolour

crayon, oil pastel, watercolour ink and scraping

wet on wet watercolour ink on brown envelope
this is meant to look like a Tomato Grouper :)
Project 1 Making Marks : Stage 2 - Exercise 4 Bleaching

I suspect that it's going to be pretty obvious in a minute just how much I enjoyed this, but let me just say now, I absolutely love bleaching!!!!!!
I am pretty surprised by this, as are my family, because I don't even use the stuff to clean with, I'm pretty anti chemical and pro environment and for years I've used mainly baking soda, vinegar and lemon juice to clean our house with. I decided that I wanted to give it a go anyway on a bit of a whim when I saw a bottle of bleach on sale for 30p and I am really glad that I did. I do have a slight amount of guilt but I'm managing to rationalise it by telling myself that I'm using such a tiny amount and it is watered down already and I'm sure it pales into insignificance compared to what many people pour down their toilets every day, and then to make myself feel even better I put the leftovers in a jar and put it in the bin, although now I'm picturing it sitting in a landfill for the next bazillion years so it's not making me feel better at all!
But.......it just gives such beautiful results!

watercolour ink and bleach

watercolour ink and salt and bleach on envelope

bleach on tissue paper
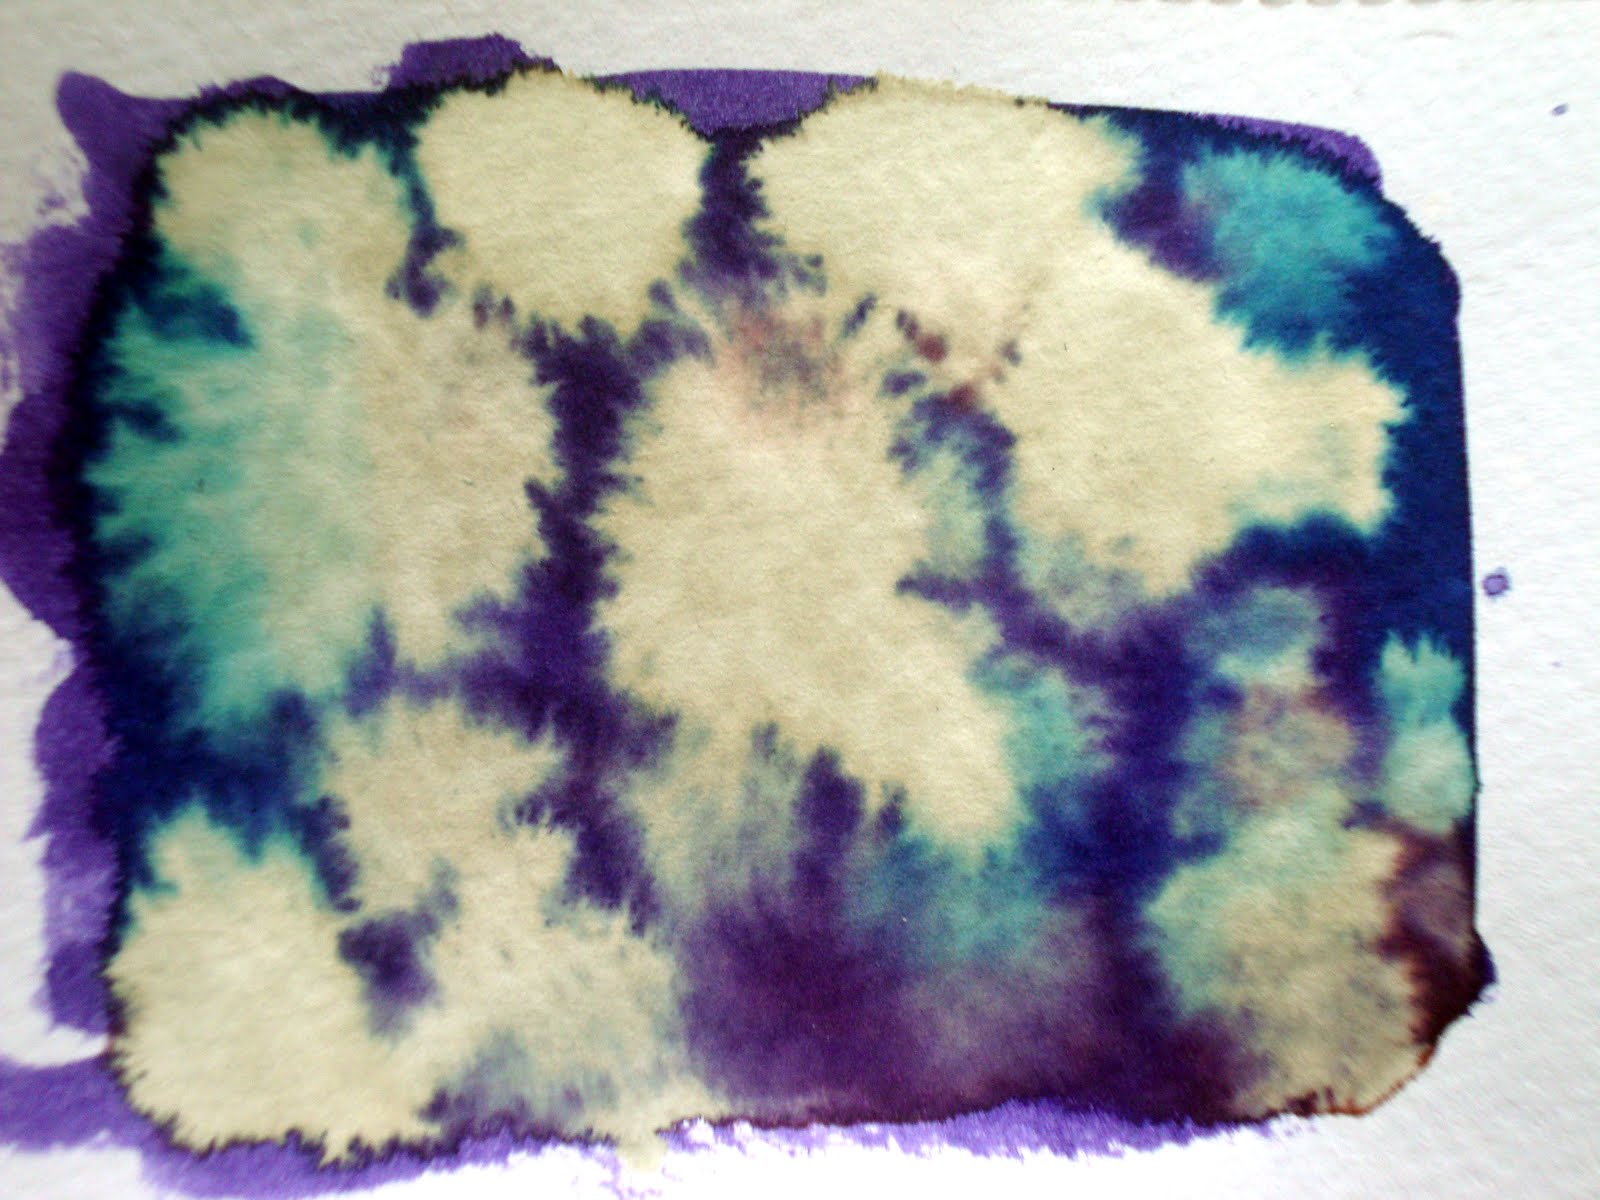
watercolour ink and bleach

envelope inside with watercolour ink and salt and bleach and lemon

watercolour ink and bleach on tracing paper

Caran d'Ache and Aquarelle and bleach

Copic Marker and bleach

watercolour ink and bleach

watercolour ink and bleach

teabag paper, watercolour ink, salt and bleach

(my favourite) watercolour ink and salt and guess what?

Yup! Thats bleach!

and that one

and finally yet another self indulgent close up :)
Bleach? Who'd of thought it could be so pretty?
Project1 Making Marks: Stage 2 - Exercise 4 - Combing, Collaging, Rubbing and Resisting

This was the result of my first days worth of experimenting with exercise 4.
As with the previous exercise, I had some preconceived ideas about the techniques that I liked or didn't as the case may be, but most of them did turn out to be quite pleasing to me.
There was one notable exception, I think I just don't get rubbing! I remember really disliking it when I was at primary school, because nothing ever turned out as clean as I wanted it to and a quarter of a century later I still really dislike it. I tried various surfaces - table mat, brick wall, carpet, pinecone, bike tyre and the seat of an old kitchen chair- but I just became frustrated by it. So I shall speak no more of it!

I really enjoyed working on this technique. I've been reading A Complete Guide To Creative Embroidery and it had an awesome section on manipulating paper that really inspired me. I'd like a chance to explore the possibilities a bit further in the future.

I went and raided my children's make-and do box in the middle of the night and secretly stole away their crayons so that I could make some resists! I did give them back when I was finished though:) I really enjoyed them while i had them though. I also worked some layered resists with crayons and oil pastels and then scraped through the levels to reveal what was underneath. I spent quite a bit of time using blue and orange together after I saw this painting by Picasso


I did quite a bit of combing and scraping through wet gouache because I really liked the impasto effect once the thick paint had dried. This particular example was made using toe separator, which I also used to do some block printing , but I also tried out a fine tooth comb, a homemade cardboard comb and a cuticle stick.
 I liked the effect that I could achieve from crumpling the paper repeatedly and then using oil pastel and water colour ink on it. I especially like the effect used on thick brown envelope paper, I read about the technique in Drawn To Stitch but I was still amazed by how fabric-like paper can become when treated in this way.
I can definitely see many possibilities in using these techniques and I would like to be able to put some time aside to experiment with them a bit more.

I can definitely see many possibilities in using these techniques and I would like to be able to put some time aside to experiment with them a bit more.
Sunday, 13 November 2011
Project 1 Making Marks: Stage 2 - Exercise 3
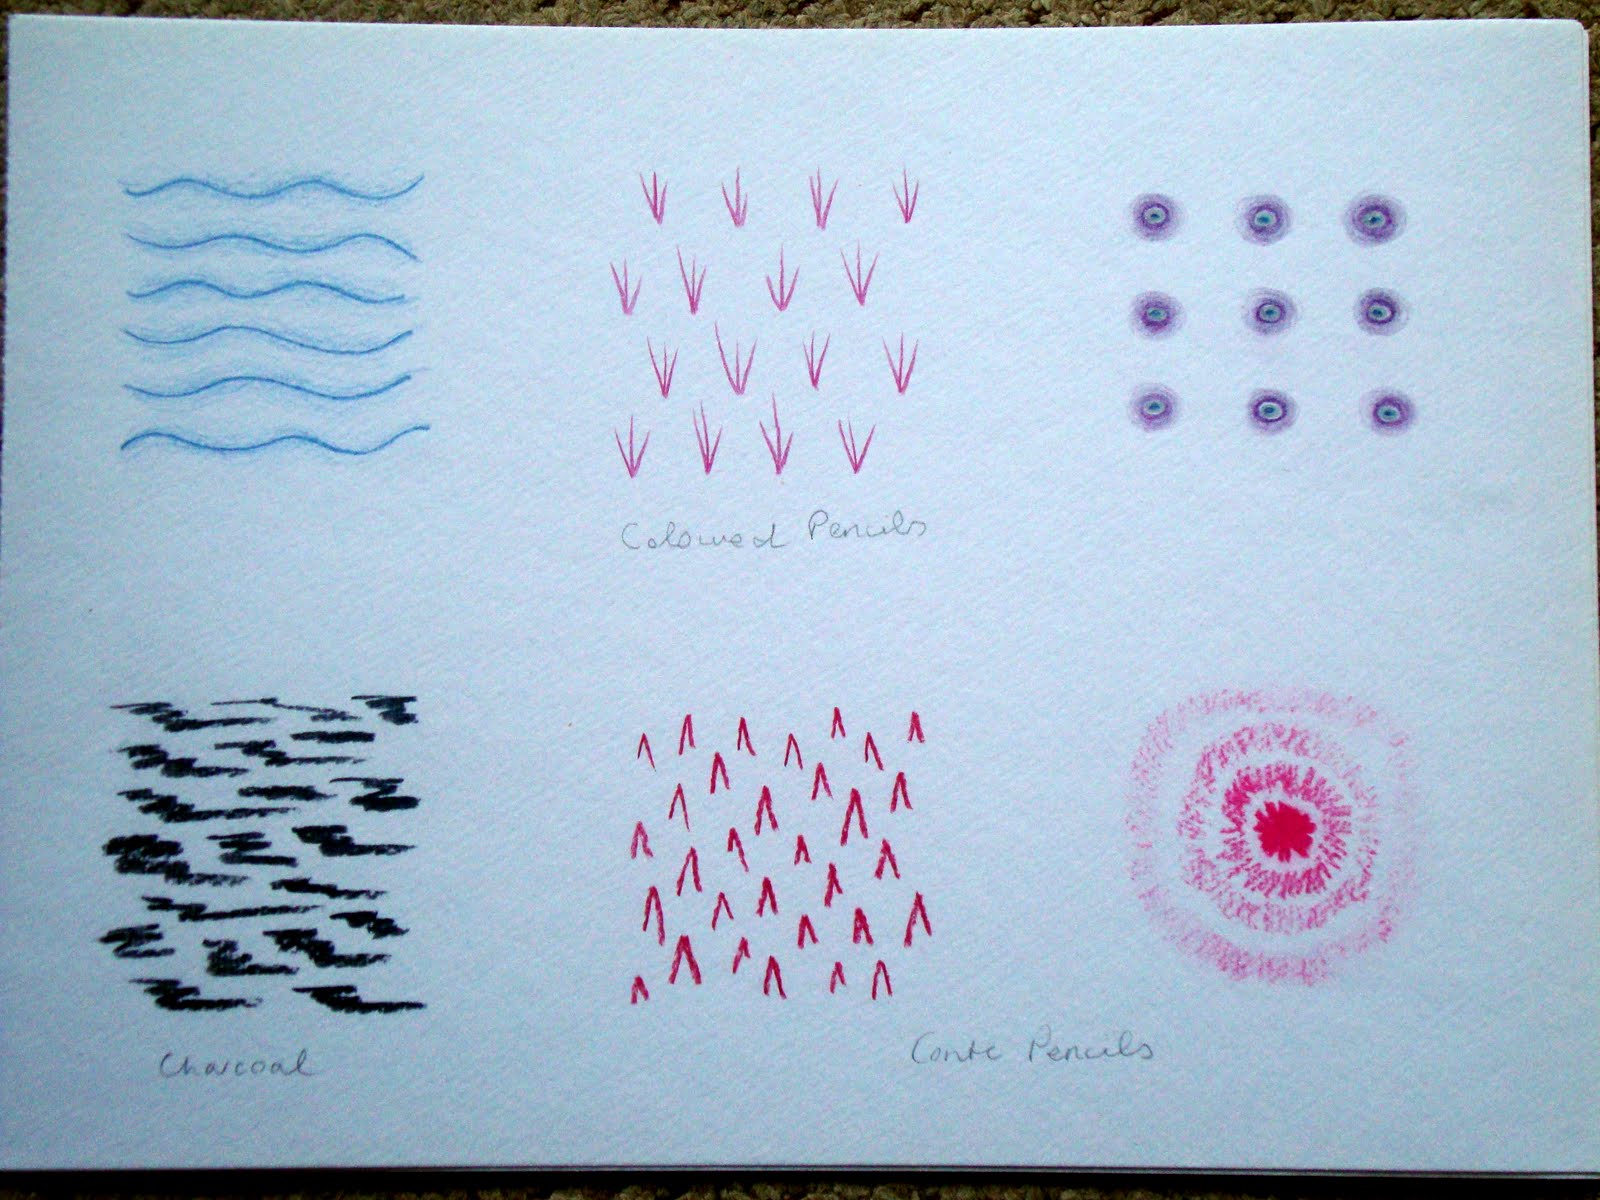
coloured pencils,
charcoal, conte pencils

watercolour pencils (which turned out to be normal pencils so really it
should be coloured pencil with watercolour pencil over the top!),
Aquarelle crayons

Derwent Aqua Tones,
Oil Pastels

Soft pastels,
Caran D'Ache

Watercolours

Copic Markers,
Staedler Fineliners

soft, sharp, hard
smooth, slow, busy

fresh, magic, old,
sad, lively, new

sad, happy, fast,
sensuous, bumpy, delicate


fast, sharp,
delicate, soft,
sad, bumpy,
smooth, sensuous
Well, I think it's probably quite apparent how much I enjoyed this exercise, I found it quite hard to stop, in the end I ran out of paper!
I enjoyed some mediums more than others, watercolours are my first true love, i adore the textures you can achieve with them, especially wet on wet, I could've sat and played with them all day. The pens - Copic markers and Staedler fineliners- are so easy to use, I like the amount of control that I have over them and the huge amount of different results that can be produced.
I've had this preconcieved idea for many years that I dislike pastels, both soft and oil, maybe because I've found them hard to control, but this exercise really showed them to me in a new light and I enjoyed the looseness and the thickness and the real depth of colour that they impart.
Aquarelle crayons were also a revelation to me, for some strange reason it had never occurred to me to try adding water to them, but actually taking the time to read the box opened up a whole new crayoning experience to me.


Project 1 Making Marks: Stage 2 - Exercise 1

sharp, happy, sad

hard, sharp, bumpy,
sensuous, slow, soft

delicate, happy, slow
I was really excited to get started on this exercise. I felt like I spent so long thinking about doing this course, to finally start doing it was quite monumental for me.
Although I do quite a bit of drawing, it's a long time since I went back to basics and I probably should have done more often over the years. It was very restorative to just sit and play with my pencils for a bit without any expectations or exact plans on my part, and it really helped to restore my faith in a medium that I was feeling a bit jaded with. I enjoyed the linking of words to patterns and actually found it quite therapeutic
Subscribe to:
Posts (Atom)